Keeping track of where your potential clients are in your sales pipeline can be hard.
Have you contacted your new leads?
Have they scheduled their free Facebook ad audit?
Have you reviewed their account?
Have you presented the proposal?
Have you followed up with the client after presenting the proposal if they didn’t sign right away?
Has the client accepted and have you started the billing/intake process?
There’s a lot to pay attention to.
More...
We understand. We have to do the same for the many clients we work with here at FunnelDash. We know exactly how many moving parts there are to closing a client and how hard it can be to keep track of them all.
That’s why we created Deals, to help you keep it all sorted. We’ve built a sales pipeline tool into the FunnelDash app to make it easier for you to see where each potential client is in your process.
That way you won’t have to wonder what’s going on with your latest potential client. You can open Deals and see exactly where they are in the process and what you need to do to close them.
Deals is very easy to use and will save you tons of time, making your life that much better.
To get started, just click on the Deals tab on the upper right-hand corner of the FunnelDash window.

Step 1. Create a Sales Pipeline
The first thing you’ll see is a request to create a new sales pipeline.
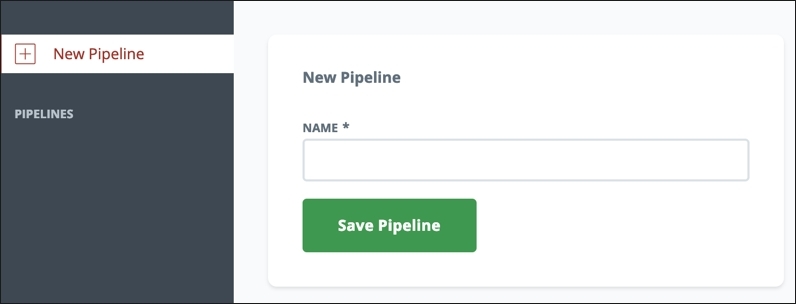
Name your pipelines for the type of contract you are offering. Common contract types include:
- Facebook Ad Services
- Funnel Build Services
- Messenger Funnel Services
- Website Build Services
- SEO Services
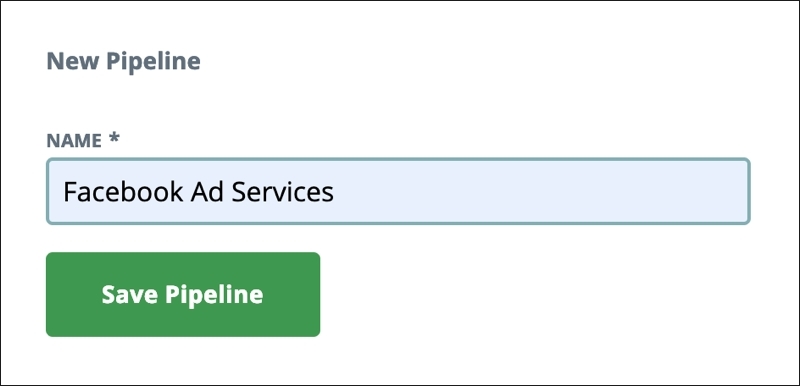
How you name your sales pipelines is up to you. If you only offer one service, you can name them after the niches you serve or the size of the contracts.
You can use Deals to track the progress of work with any client for any project type, regardless of whether you use FunnelDash dashboards to track its metrics.
Once you add your new pipelines, you’ll see them populated on the far-left side of the app window.

Creating a New Deal in Your Pipeline
You’ll put a Deal for each of the contracts you create into each specific sales pipeline. This keeps each contract type separated out and makes it easier to see where your moving parts are at any moment. It also helps avoid sending an email about the wrong project type to customers currently in your sales pipeline.
Click on the pipeline for the project type you want to create a new contract in for a potential client. Then click the green “New Deal” button.
You’ll see a popup box asking for the following information:
- Deal Name: Name your deal so you’ll remember which one it is. We also recommend putting the monthly retainer your requesting in this field so you always have it visible.
- Contact Name: Name of the person you’re working with on this proposal and contract.
- Contact Email
- Contact Phone
- Annual Deal Value: Multiply your monthly retainer by the number of months you’re proposing to work with this client. So, $3,000 a month X 6 months = $18,000.
- Notes: You can add whatever information you want in this field I will give more detail on this in the next section.
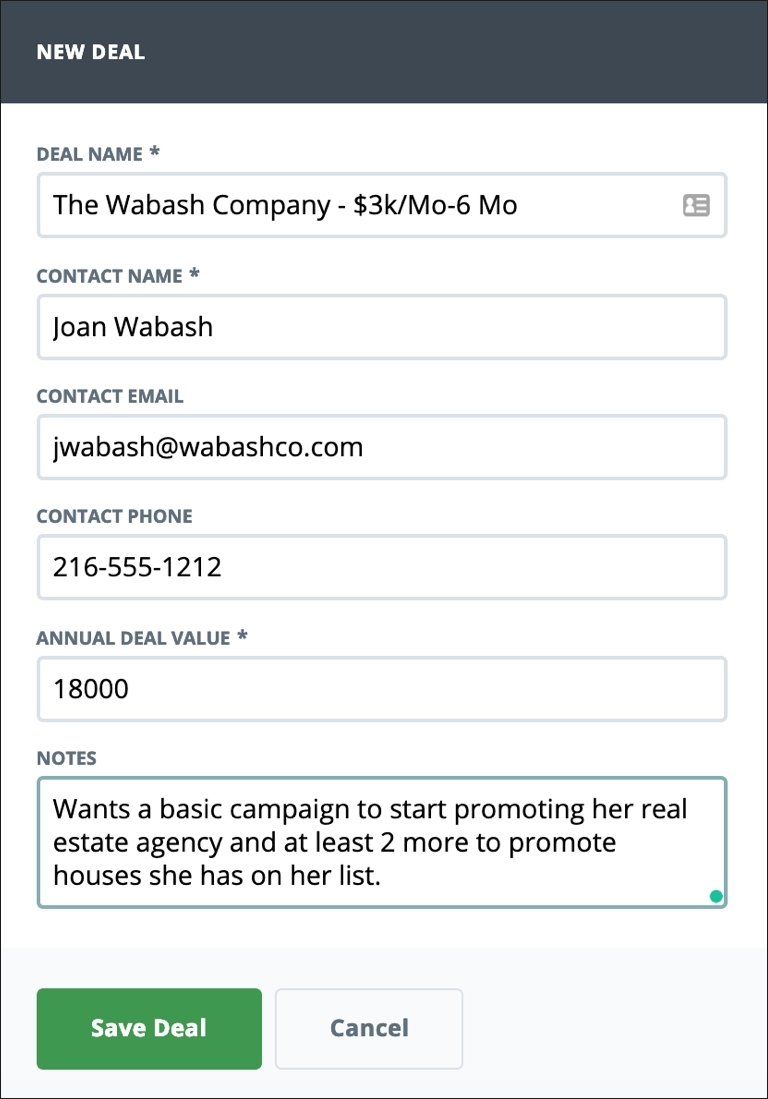
Click “Save Deal.”
You’ll now see your new Deal in your sales pipeline.
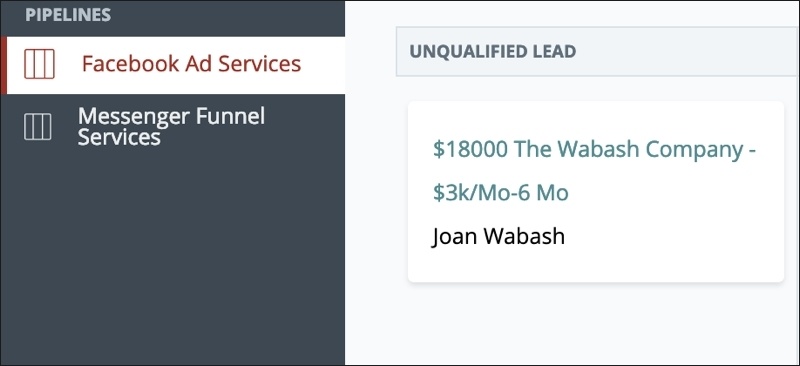
As your potential client moves through your sales pipeline, you can drag their card from column to column so you can track their progress.

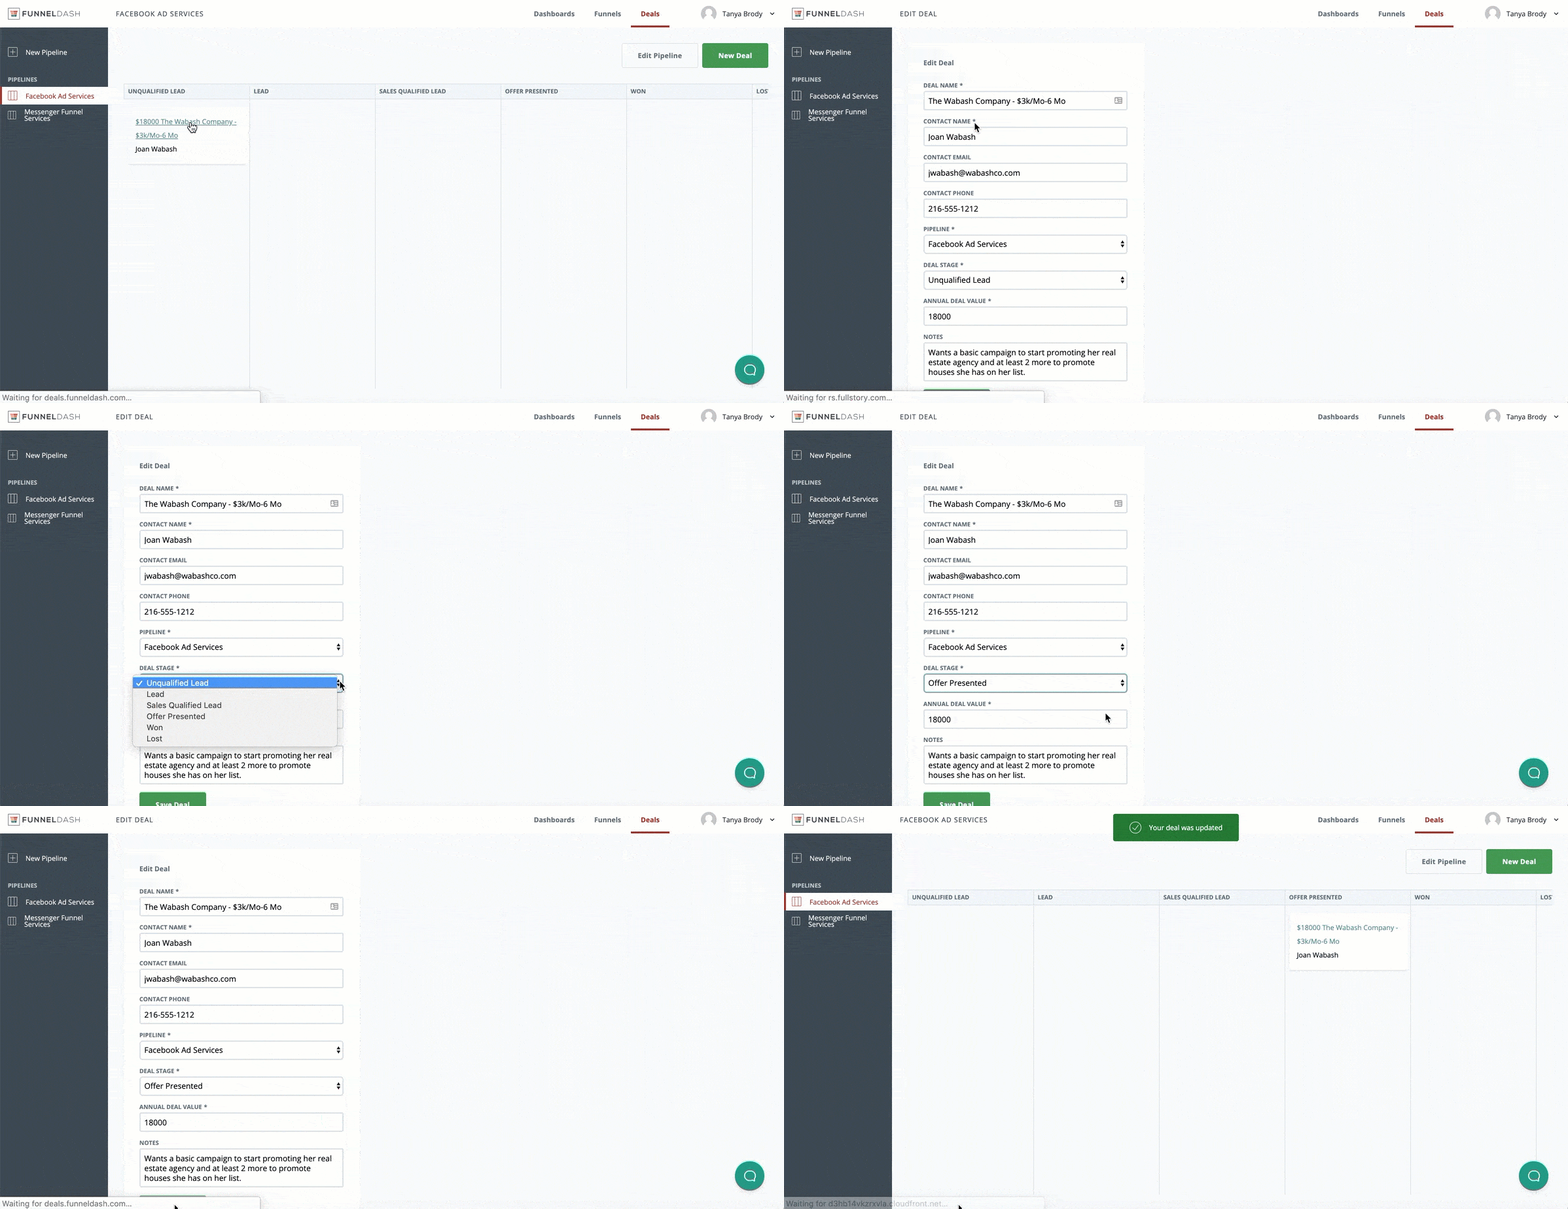
Once your Deal is saved, you’ll see a dropdown menu inside the Deal details. You can also choose the column from the dropdown menu to set the destination for your Deal.
Managing Your Sales Pipeline
Once you have Deals moving through each of your sales pipelines, you’re in business. This will happen quickly, once you create an Agency Messenger Funnel and attach a Messenger sequence to get new leads into your agency.
As you may know, FunnelDash makes it easy for a potential client to give you access to their Facebook ad account, so you can review their current campaigns in a Facebook ad audit.
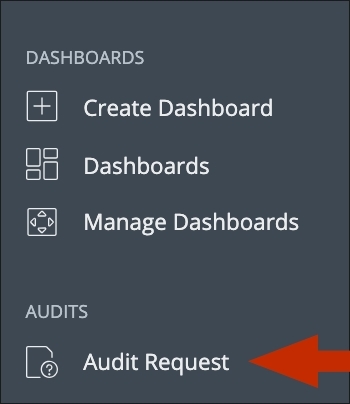
You can find this function in the Dashboards section of the FunnelDash app, on the left-hand menu.
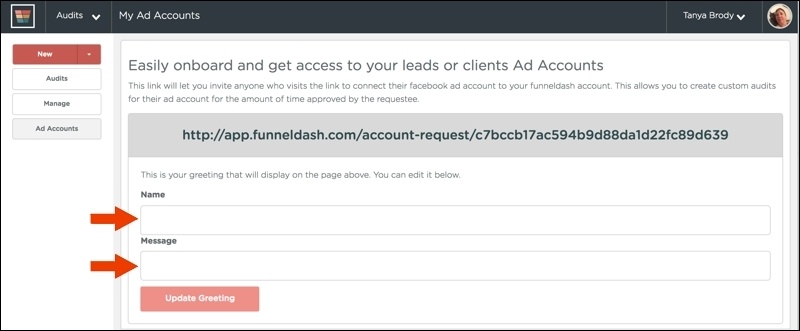
To request ad account access from a potential client, simply add your name and a short message to the fields on the form. Then send your potential client the link on the form.
This link is specific to your FunnelDash account. You won’t be able to make any changes to their Facebook ad account, but you will be able to view all of their information in your FunnelDash dashboards, once they give you access.
Your potential client will see this request form when they click on the link:
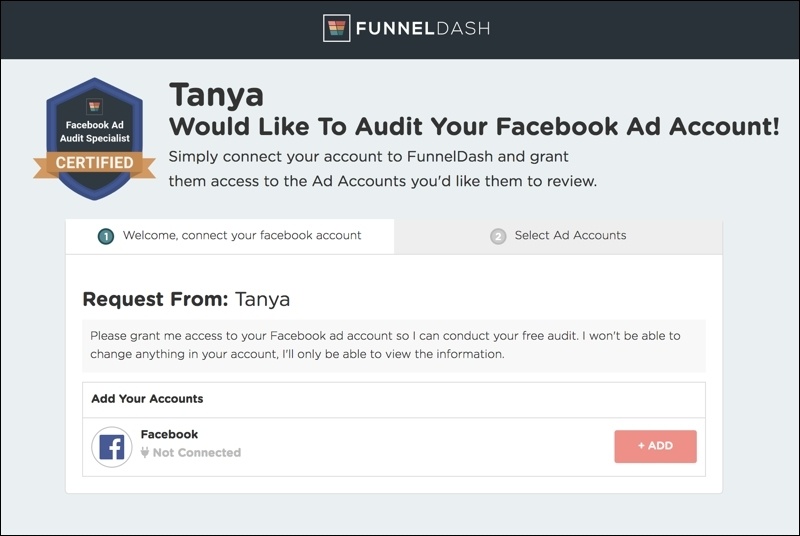
They can connect their Facebook ads account and choose the amount of time they want to give you access.
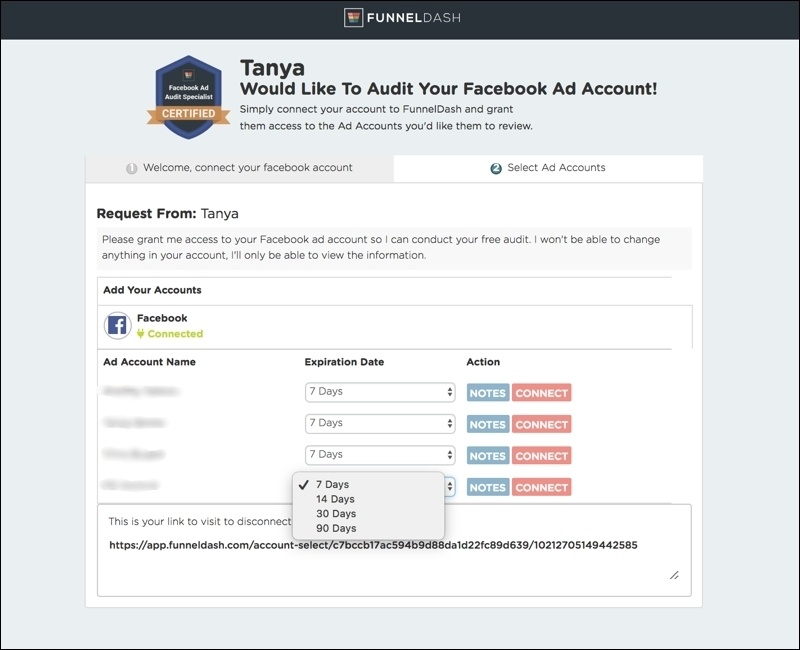
Once you have access to their account, you’ll be able to create a Facebook Ads Audit dashboard inside your FunnelDash account.
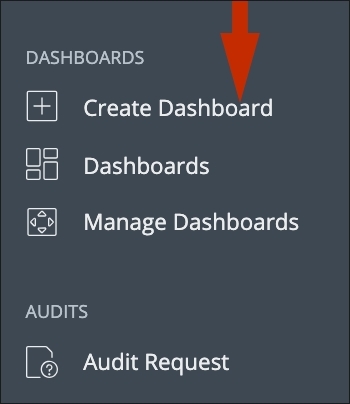
In the Dashboards section of your account, click on Create Dashboard on the left-hand menu.
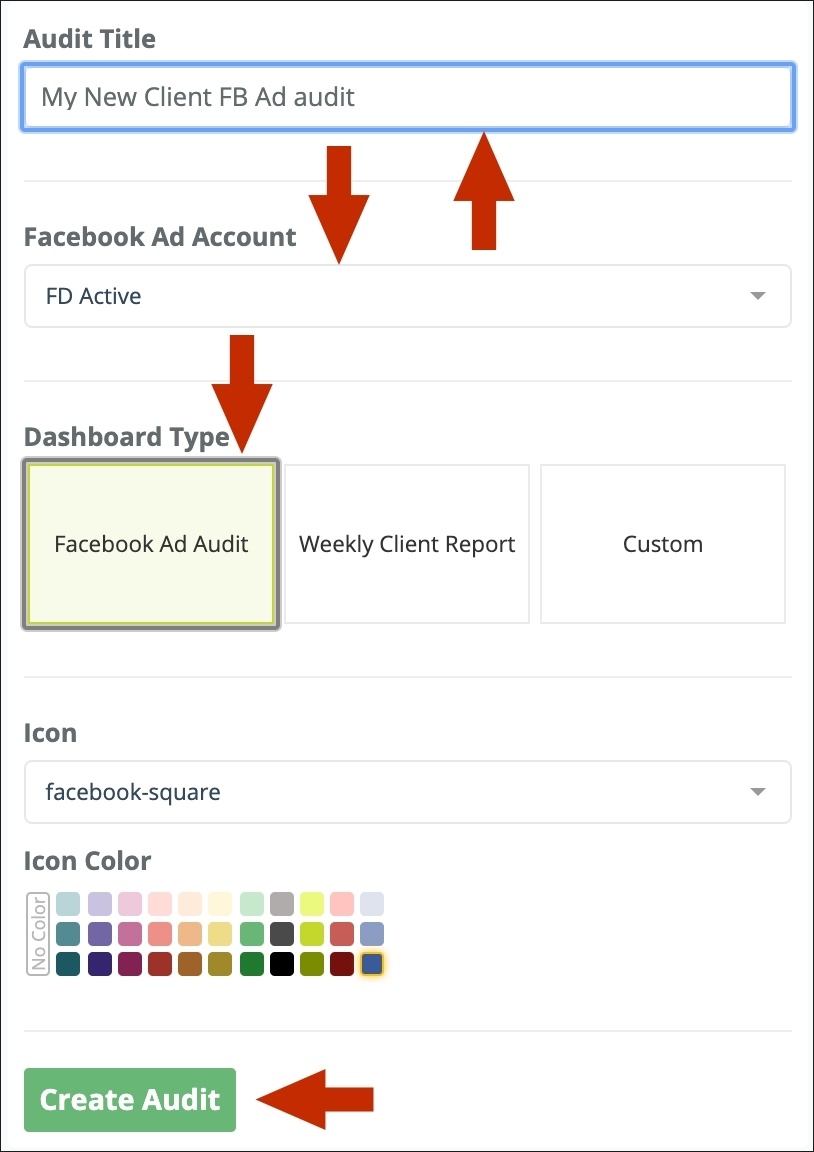
In the Audit Title field, enter the name for your new dashboard, preferably including your potential client’s name and any other important information.
Choose your potential client’s account from the Facebook Ad Account dropdown menu.
Select Facebook Ad Audit from the Dashboard Type options.
Click on the green “Create Audit” button.
Your new dashboard will automatically populate with your potential client’s Facebook ad account data.
At the top right of the dashboard, there is a series of buttons. Click on the button with the arrow pointing to the right.
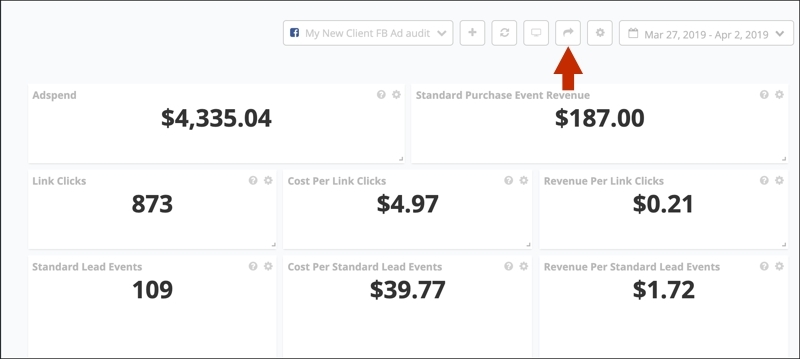
A box will pop up that allows you to share the link to this dashboard.
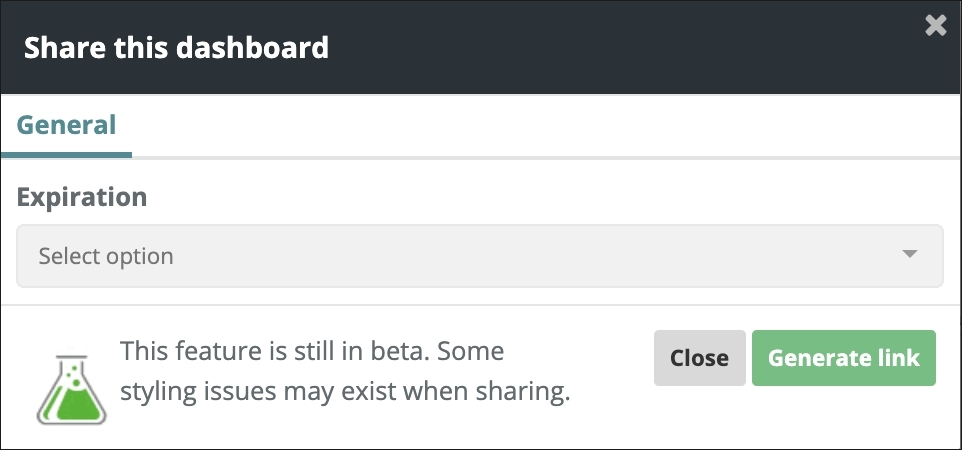
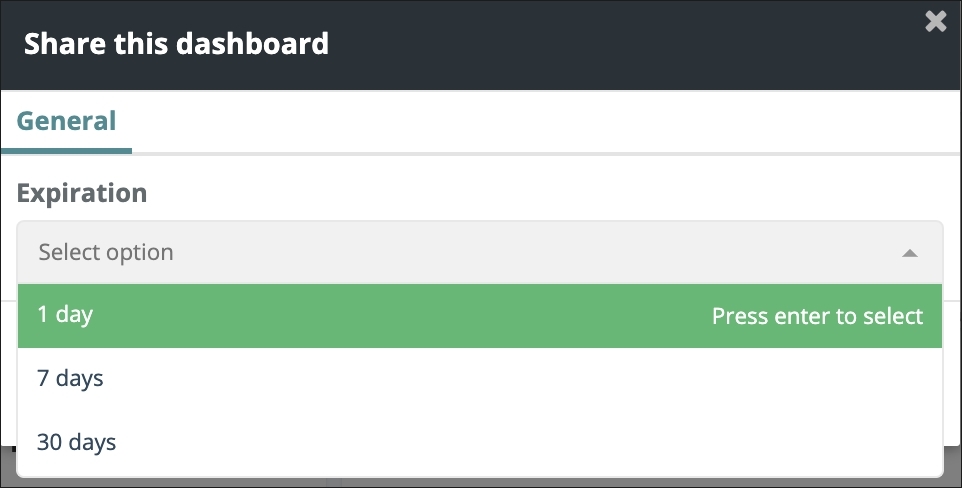
Click on the dropdown menu and choose the number of days you want the link to exist. Then click on the green “Generate Link” button.
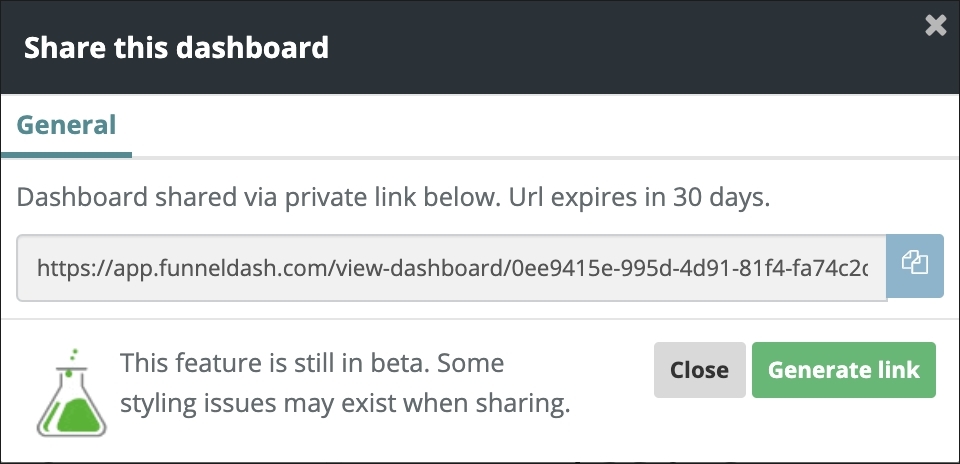
You will see your link displayed within the box. Click on the blue copy link button on the right side of the box, then close the popup box.
Go back to the Deals tab in the app and open the Deal for the potential client you just created the Facebook Ad Audit dashboard for. Paste the link for that dashboard into their Notes section.
Now you have easy access to their Facebook Ad Audit dashboard link, as well as the dashboard itself, whenever you need it.
As each potential client moves through your sales pipeline, update their notes section at each step, so you and your team all have a “source of truth” to refer to, regarding that potential client’s status and progress in converting them into a paying client.
Manage All of Your Incoming Agency Leads with Deals
As you can see, using Deals is a very easy way to keep track of everything happening on the sales and customer acquisition side of your agency.
Want to know how using FunnelDash can make getting and managing your clients easier? Click on the button below to save your seat for our free video training on creating a 7-Figure Agency Funnel.
Let us know what you think of Deals and how you’re using it to manage incoming leads and client offers in the FunnelDash User Community or in the comments.

